Archive for the ‘Do-it-yourself’ Category

Amazon EC2 Gentoo AMIs and the Cloud

Lately I have been very much traveling around and visiting different conferences related to cloud computing. I have been discussing a lot the assets and drawbacks for us at work to put some stuff into the cloud. Well, very soon I had to dig into the AWS. I had a look at all the available EC2 AMIs and I asked myself why there is no recent gentoo based x86_64 AMI for Amazons EC2. And in truth I needed a proper gentoo EC2 AMI asap to start testing.

So what’s wrong? Is it too much weird command line kung fu to create such an machine image? Or is there no demand for Gentoo x86_64 images? People don’t use Gentoo anymore since the Gentoo hype was over long before there was AWS? Gentoo people are unaware there is 64bit available and still stick to 32bit? AWS people don’t want Gentoo people to use Gentoo images since the Fedora machine images are much better for everyone? Yeah.

I deceided to roll out my own AMI. I did some research and read lots of articles about the different ways to create those machine images. Twenty minutes later I felt enlightened:

1. You can convert an existing xen image or
2. create your AMI with VMware and convert this or
3. you can use an existing AMI and base your AMI on it and so forth.

Sounds like crap. I like building things by my own and have more control on the inside of the result.
It took some time to figure out how to proceed and how to solve small emerging hurdles.

Working on a good build host it takes maybe twenty to thirty minutes from zero to have a basic AMI ready to go. Basically you need to create the AMI file, format it with some filesystem, mount the file as a loop device, extract an stage3 archive, install some requirements and modify some config files. The most time is wasted waiting for ec2-upload-bundle to complete. It’s enough time to get another cup of coffee, sit on the sofa and read some pages in the newspapers.

I think the result is pretty good already. I have completed different automations and have begun working on the details to create almost autonomous clusters, this is again funny stuff with crons, bash, sed, awk and perl.

EC2 is definitly very interesting. If you need some help with gentoo AMIs you can just sent me an email or put a line in the comments.

All the best, Emil

Yummy for the tummy

After I returned home from a vacation much too short I am now alone at home for another week – the family is spending some more time in vacation. Soooo. I have to feed myself.
This is what I have created in less than 40 minutes without any recipe – a pizza. And no, it is not convenience food.

Take some flour, cheese, tomato sludge, water, yeast, salt, olive oil, olives, onions, garlic, more vegetables and scramble it until you have a homogeneous pulp and smear it onto the baking sheet.

Building another fly rod part 2

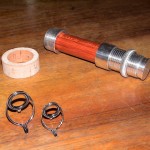
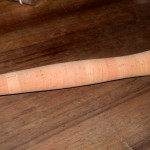
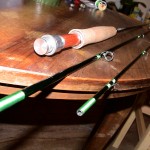
Due to given circumstances I have not been able to kick off this project earlier. On the 23rd of February we had a great handwork evening at home – Sarah was tailoring next to me and I was glueing the grip and wrapping the guides onto the fly rod blank.

I bought my parts from the US and Germany. The main reason for this is plain simple. In Germany I haven’t found any dealer for the stripping guides.

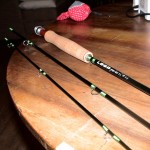
  • Loop Green Line series blank  in 9′3″ and the specified line class is #6-7
  • Cork Fly Rod Grip Reverse Half Wells – supreme quality
  • Fuji Concept Stripping Guides – SiC ring in 16 and 12 /w Chrome finish
  • Struble Fly Rod Reel Seat – Standard Uplocking U-3 – Polished Alum. /Cocobolo
  • Pacific Bay Snake Guides in 2,2,2,2,3,4,5 Chrome finish
  • Pacific Bay Fly Rod Tip Top – Chrome finish / Std. loop / size 5 tube
  • Pacific Bay Aluminum Winding Check – TiCH finish / 0.342 in. I.D.

On Sunday I am going to take it with me to the coast. I am already very excited.

March 2009

Oh no, it’s already march?! Being so busy seems to quicken the days passing by. Nontheless, tomorrow my younger brother has his 29th birthday (Hey hey (: )  and today in the evening is parents’ evening in the kindergarten (first time for me). On Saturday we are going by to buy a new table, chairs and stuff for the kitchen and leaving the boys in my mums’ care. A few hours exclusive free time. And last but not least this Sunday I am finally going to have a day on the coast to test my new self built fly rod. I am going to meet there with Marco, a friend of mine.  Sarah expects me to catch at least one seatrout for dinner. Pretty much expections….

Building another fly rod part 1

You might already have seen the short blog entry for my first fly rod building project. So, on Friday I suddenly felt like I’d have to act at once and place an order for some rod building material. There are several reasons. One reason is that I am all alone at home from the 18th to the 26th of this month. Sarah, Erik and Einar are going to Nuremberg. Being busy kills time. Another reason is pure consuming desire I just wanted to do something besides the usual things. Yes, recently I once again enjoy sitting on the table in the evening doing handicraft work. In short it means less computer related occupation at home – I spend enough time at work in front of my screen.

I’ll blog in detail the steps of building the new rod when all the parts have arrived.

FlashEmbedded Family

On Sunday we have been on a visit to my older brother and his family. Nerdy as I am I had our Sony Handycam with me on the trip and arrived back at home with plenty of new video footage. So I just wanted to make some videos available and digitalized and converted the dv source material from the camcorder with dvgrab and ffmpeg.

So this is some kind of a minimal HowTo, hope this helps someone.

If you are like me, you don’t like the idea to rely on 3rd party websites like younameit.xyz. There are a few good reasons to keep the video on your site – you have the physical control and you don’t need to accept confusing licence agreements. So here we go!

First I piped the output of dvgrab directly from the firewire to ffmpeg. This deinterlaced, converted and scaled the dv file to something more useful for a web page. I think that the following options are fine, feel free to change them and of course make use of man dvgrab and man ffmpeg.

dvgrab -format dv1 – | ffmpeg -deinterlace -f dv -i – -f flv -vcodec flv -s qvga -aspect 1.333 -qscale 3.5 -acodec libmp3lame -ab 32k -ar 22050 example.flv

Next I uploaded the example.flv file into the root directory of the domain. I use the open-source FlowPlayer Flash applet to actually embed the FLV video in my web page. I had to get a copy of the flowplayer.swf and flashembed.js from their page and copied the files to the root directory as well.

And finally I added the following lines to the html page.

<!– include flashembed –>
<script src=”flashembed.js”></script>

<!– this DIV is where your Flowplayer will be placed. –>
<div id=”videodiv” style=”width:640px;height:503px”></div>

<script>
// place Flowplayer to our DIV
flashembed(“videodiv”, “FlowPlayer.swf”, {config: {

// Flowplayer configuration as comma separated list
videoFile: ‘example.flv’,
initialScale: ‘scale’

}});
</script>

That’s it. You should now have your video embedded in your page.

Building a fly rod part 1

This afternoon I have successfully finished building my first fly rod. I have bought two identical Loop blanks from the Loop Green Line series in 9’3″ and the specified line class is #6-7. I am very satisfied with the result and waiting to test it extensively. If the rod performs well I am going to build yet another.